From Chaos to Clarity: Safeguarding Your Family’s History

Once you’ve assessed, organized, and digitized your genealogy materials, it’s essential to ensure that your physical records are stored properly to prevent damage and deterioration over time. Proper storage is crucial for preserving your family’s legacy and ensuring that future generations can access and appreciate the rich history contained within these valuable documents. In this article, we’ll discuss the best practices for storing and protecting your genealogy materials, keeping them safe and secure for years to come.

Properly Storing and Protecting Your Genealogy Materials

Once you’ve assessed, organized, and digitized your genealogy materials, it’s essential to ensure that your physical records are stored properly to prevent damage and deterioration over time. Proper storage is crucial for preserving your family’s legacy and ensuring that future generations can access and appreciate the rich history contained within these valuable documents. In this article, we’ll discuss the best practices for storing and protecting your genealogy materials, keeping them safe and secure for years to come.

Choose archival-quality materials:
When storing your genealogy materials, opt for acid-free, lignin-free, and archival-quality storage materials such as folders, boxes, and sleeves. These materials are designed to protect your documents from damage caused by acidity, moisture, and light, ensuring their longevity.

Protect photographs and documents:
Place photographs and documents in clear, acid-free, plastic sleeves or enclosures to shield them from dust, dirt, and fingerprints. For added protection, consider using archival-quality photo corners or mounting strips when attaching photos to album pages or mat boards.

Use acid-free labels and pens:
Label your folders, boxes, and enclosures with acid-free labels and pens, which won’t damage your materials over time. Archival-safe pens and pencils can also be used to label the materials themselves, if necessary.

Store materials in a cool, dry, and dark environment:
To prevent deterioration, store your genealogy materials in a cool, dry, and dark environment. Ideal storage conditions include temperatures between 65 and 70°F (18-21°C) and a relative humidity of 35-50%. Avoid storing materials in basements, attics, or garages, where temperatures and humidity levels can fluctuate dramatically.

Keep materials away from direct sunlight:
Prolonged exposure to direct sunlight can cause fading, discoloration, and other damage to your genealogy materials. Store your materials in a location that doesn’t receive direct sunlight, or use UV-filtering glass or acrylic for framed items on display.

Guard against pests and mold:
Ensure that your storage area is free from pests and mold, which can cause significant damage to your materials. Regularly inspect your storage area for signs of infestation or mold growth, and address any issues promptly.

Organize materials by categories:
Store your genealogy materials according to the categories and organization system you developed during the organization process. Keeping materials organized in this manner will make it easier to locate specific documents or records when needed.

Maintain an inventory:
Create and maintain an inventory of your stored genealogy materials, noting the location and contents of each folder, box, or enclosure. This inventory will serve as a reference guide, helping you quickly locate materials and ensuring that nothing is misplaced or lost.

Update your storage methods as needed:
As technology and preservation techniques evolve, consider updating your storage methods to ensure that your genealogy materials remain protected and secure. Stay informed about advances in archival materials and best practices for storing and preserving genealogy materials.

Properly storing and protecting your genealogy materials is a critical aspect of preserving your family’s history for future generations. By following the best practices outlined in this article, you can ensure that your precious records, documents, and photographs are safeguarded against damage and deterioration, allowing your family to appreciate and explore their rich heritage for years to come.

From Chaos to Clarity: Branching Out

Now that you’ve sorted, organized, and digitized your genealogy materials, it’s time to create a visual representation of your family’s history through a family tree. A family tree is an invaluable tool for understanding your ancestry, identifying patterns and connections, and sharing your heritage with others. In this article, we’ll guide you through the process of creating a family tree using your organized genealogy materials and various digital resources.

Creating a Visual Family Tree from Your Organized Genealogy Materials

Now that you’ve sorted, organized, and digitized your genealogy materials, it’s time to create a visual representation of your family’s history through a family tree. A family tree is an invaluable tool for understanding your ancestry, identifying patterns and connections, and sharing your heritage with others. In this article, we’ll guide you through the process of creating a family tree using your organized genealogy materials and various digital resources.

Choose the right software or platform:
Select a genealogy software or online platform that best suits your needs and preferences. There are numerous options available, such as Family Tree Maker, Roots Magic, Gramps, or online services like Ancestry and MyHeritage. Each offers unique features, so consider factors like ease of use, data management capabilities, and integration with other genealogy resources when making your choice.

Organize your family tree:
Start building your family tree by entering individuals and their relationships, such as parents, spouses, and children. Organize your tree in a logical and visually appealing manner, typically with the oldest generations at the top and the youngest at the bottom. Most software and platforms offer various layout options, so choose one that best represents your family’s structure.

Add detailed information:
Include as much detail as possible for each person on your family tree, such as full names, birth and death dates, locations, and occupation. Attach relevant documents, photos, or other materials from your digital archive to individual profiles to enrich your family tree and provide context.

Verify and source your information:
Ensure the accuracy of your family tree by verifying the information you’ve entered against your genealogy materials and other reliable sources. Cite your sources and attach any relevant documents or records to your family tree as evidence.

Explore potential research leads:
As you build your family tree, you may identify gaps in your knowledge or potential research leads. Use these insights to guide your future genealogy research, seeking out additional records, documents, or resources to fill in the blanks and expand your understanding of your family’s history.

Share and collaborate:
Share your family tree with relatives and fellow researchers, allowing them to contribute information, verify details, or provide feedback. Many genealogy platforms offer collaborative features, such as shared trees or online forums, which can help you connect with others and gain new insights into your family’s past.

Update and maintain your family tree:
As you continue your genealogy research, you will undoubtedly discover new information, relationships, or connections. Regularly update and maintain your family tree to ensure its accuracy and completeness, incorporating new findings and revising any errors or discrepancies.

Creating a visual family tree is a rewarding and engaging way to bring your family’s history to life. By using your organized genealogy materials as the foundation for your tree, you can create a comprehensive, accurate, and visually appealing representation of your ancestors and their relationships. As you continue to research and expand your family tree, you’ll uncover new connections and insights into your family’s unique story, preserving and celebrating your heritage for generations to come.

From Chaos to Clarity: Preserving Your Family’s Legacy

Once you have assessed, organized, and labeled your genealogy materials, it’s time to consider digitizing your collection. Digitization not only helps preserve important records and documents, but also makes it easier to share your family history with relatives and fellow researchers. In this article, we’ll walk you through the process of creating a digital archive of your genealogy materials, ensuring that your family’s legacy is safeguarded and accessible for future generations.

Digitizing Your Genealogy Materials for Easy Access and Sharing

Once you have assessed, organized, and labeled your genealogy materials, it’s time to consider digitizing your collection. Digitization not only helps preserve important records and documents, but also makes it easier to share your family history with relatives and fellow researchers. In this article, we’ll walk you through the process of creating a digital archive of your genealogy materials, ensuring that your family’s legacy is safeguarded and accessible for future generations.

Choose the right tools:
Invest in a high-quality scanner or a digital camera to capture clear images of your documents and records. Scanners with an automatic document feeder (ADF) can be especially helpful for digitizing large quantities of papers quickly, while a digital camera with a tripod and good lighting is useful for photographing larger or fragile items.

Scan or photograph documents:
Scan or photograph each document or record, capturing images at a high resolution (300 DPI or higher) to ensure that details are preserved. When scanning or photographing, ensure that the entire document is visible, and that the images are clear and in focus. Be gentle with fragile materials to avoid causing damage.

Organize digital files:
Create a digital filing system that mirrors the physical organization of your genealogy materials. Use clearly labeled folders and descriptive file names that include the relevant names, dates, and relationships. This will make it easier to locate specific files in the future.

Example file naming format:

Surname_GivenName_Event_Year
(e.g., Smith_John_Birth_1900)

Convert files to standard formats:
Save your digital images in standard file formats, such as PDF for documents and JPEG or TIFF for photographs. These formats are widely supported and ensure that your digital files remain accessible and compatible with various devices and software.

Backup your digital archive:
To protect your digital archive from potential data loss, create multiple backups of your files. Store copies on your computer, an external hard drive, and a cloud-based storage service. Regularly update your backups to ensure that any new additions to your digital archive are preserved.

Share with family members:
With your genealogy materials digitized, it’s easier than ever to share your family history with relatives. Consider creating a shared online folder, using cloud-based services like Google Drive or Dropbox, where family members can access and contribute to the digital archive. This collaborative approach helps engage and connect your family through the exploration of your shared heritage.

Utilize genealogy software:
Genealogy software can help you manage, analyze, and visualize your family history data. Import your digital archive into a genealogy software program, such as Family Tree Maker, Roots Magic, or Gramps, to create a comprehensive family tree, generate reports, and identify potential research leads.

Stay up-to-date with digitization best practices:
As technology evolves, so do digitization practices and standards. Stay informed about new techniques, tools, and best practices for digitizing and preserving genealogy materials to ensure that your digital archive remains accessible and secure over time.

Digitizing your genealogy materials is an essential step in preserving and sharing your family’s history. By creating a digital archive, you safeguard your precious records and documents, making them easily accessible to current and future generations. As you continue to expand your family tree, your digital archive will serve as a lasting testament to your ancestors’ lives and legacies, connecting your family through a shared appreciation of your rich heritage.

From Chaos to Clarity: The Art of Identification

With your genealogy materials sorted and categorized, the next crucial step is to label and date each document and record. Proper labeling and dating not only make it easier to find and understand the information in the future, but also ensure that your family history remains organized and accessible. In this article, we’ll guide you through the process of effectively labeling and dating your genealogy materials, helping you create a clear and navigable archive of your family’s past.

Labeling and Dating Your Genealogy Materials for Enhanced Accessibility

With your genealogy materials sorted and categorized, the next crucial step is to label and date each document and record. Proper labeling and dating not only make it easier to find and understand the information in the future, but also ensure that your family history remains organized and accessible. In this article, we’ll guide you through the process of effectively labeling and dating your genealogy materials, helping you create a clear and navigable archive of your family’s past.

Choose the right tools:
To preserve the integrity of your documents, it’s essential to use archival-safe pens or pencils when labeling and dating. These writing tools are specifically designed to minimize damage to delicate documents over time. Avoid using regular ink pens, highlighters, or adhesive labels, as these can cause irreversible damage.

Develop a consistent labeling system:
Create a uniform labeling system to ensure that your labels are clear, concise, and easily understood. Establish a standard format for recording names, dates, and relationships on your documents and records. Consistency is key, as it allows for easy navigation and interpretation of your materials.

Example labeling format:

Full Name (Surname, Given Name)
Date (YYYY-MM-DD)
Relationship (e.g., Father, Mother, Spouse, Child)

Identify key information:
Examine each document and record to pinpoint the essential names, dates, and relationships associated with the information. If this information is not readily apparent, use your genealogy research skills and other resources to fill in any gaps.

Label documents and records:
Label each document and record clearly and legibly, adhering to your established labeling system. Write the information in an area that does not obscure any critical details, such as the margins or on the back of the document. Be gentle when writing to avoid causing damage.

Date your documents:
In addition to labeling names and relationships, ensure that each document or record is dated. This may include the date the document was created, an event date (such as a birth or marriage), or both. Use a consistent date format, such as the international standard YYYY-MM-DD, to avoid confusion.

Label containers and subfolders:
In alignment with your overall organizational system, label the folders, binders, or other containers that house your documents and records. This will make it easier to locate and access specific materials in the future.

Refer to your previously created reference guide:
As you label and date your documents and records, refer to the reference guide you created in the earlier stage of organizing your genealogy materials. This guide will help ensure consistency throughout your genealogy project, as it contains examples of the proper format for names, dates, and relationships, as well as any other pertinent information.

Periodically review and update:
As your genealogy research progresses, you may discover new information or identify errors in your labels and dates. Periodically review and update your materials to ensure accuracy and consistency, making any necessary corrections or additions.

Effectively labeling and dating your genealogy materials is essential for maintaining a well-organized and accessible family history archive. By developing a consistent system and diligently identifying and recording key information, you’ll create a valuable resource that simplifies your research and enhances your understanding of your family’s past. With your ancestral archives labeled and dated, you’ll be well-prepared to navigate and appreciate your family’s unique journey through history.

From Chaos to Clarity: Taming the Paper Trail

After assessing your genealogy materials and creating a solid plan for organization, the next step is to sort and categorize the documents and records. This process will transform your collection from a disorganized heap into a structured and accessible family history resource. In this article, we’ll outline the essential steps for effectively sorting and categorizing your genealogy materials, making it easier for you to navigate and interpret your family’s past.

Sorting and Categorizing Your Genealogy Materials for Maximum Clarity

After assessing your genealogy materials and creating a solid plan for organization, the next step is to sort and categorize the documents and records. This process will transform your collection from a disorganized heap into a structured and accessible family history resource. In this article, we’ll outline the essential steps for effectively sorting and categorizing your genealogy materials, making it easier for you to navigate and interpret your family’s past.

Prepare your workspace and materials:
Before you begin sorting and categorizing, ensure that you have a clean, well-lit, and comfortable workspace. Gather the necessary supplies, such as folders, subfolders, labels, sticky notes, and archival-quality pens or pencils. If you’re using a color-coding system, make sure you have the appropriate colored labels or tabs.

Review your organizational plan:
Refer to the organizational plan you created in the previous step. Familiarize yourself with the categories, subcategories, and labeling system you’ve established. Keep your reference guide handy for consultation during the sorting process.

Start with one folder or binder at a time:
To avoid becoming overwhelmed, focus on sorting and categorizing the contents of one folder or binder at a time. Begin by removing all the loose papers and records from the folder or binder and laying them out on your workspace.

Sort documents by category:
Using the categories and subcategories from your organizational plan, start sorting the loose papers and records into distinct groups. Be consistent with your sorting criteria, ensuring that each document or record is placed in the appropriate category.

Create subfolders for categories and subcategories:
For each category or subcategory, create a subfolder within the main surname folder. Clearly label the subfolder according to your established labeling system. If you’re using a color-coding system, apply the appropriate colored label or tab.

Place documents into subfolders:
Once you’ve sorted the materials into categories and created corresponding subfolders, place the documents and records into their respective subfolders. Make sure each item is placed in the correct folder to maintain the integrity of your organizational system.

Label individual documents as needed:
If necessary, label individual documents or records with pertinent information, such as names, dates, or relationships. Use archival-quality pens or pencils to avoid damaging the materials.

Secure and store sorted materials:
After sorting and categorizing the contents of a folder or binder, securely store the subfolders and materials. Repeat the process for each remaining folder or binder in your collection.

Review and adjust:
As you work through the sorting and categorizing process, be prepared to review and adjust your organizational plan if needed. You may encounter unexpected materials or discover new connections that require updates to your categories, subcategories, or labeling system.

Sorting and categorizing your genealogy materials is a critical step in transforming your collection into a valuable family history resource. By following your organizational plan and diligently sorting each document and record, you’ll create a clear, accessible, and meaningful archive that will enrich your understanding of your family’s past and serve as a treasure for future generations.

From Chaos to Clarity: Charting Your Family’s Journey

After assessing your genealogy materials, the next step is to create a plan for organizing them. A well-thought-out plan will make the process smoother and more efficient, enabling you to easily access and understand your family’s history. In this article, we’ll guide you through the essential elements of crafting an effective plan for organizing your genealogy materials, ensuring a successful and enjoyable project.

Crafting an Effective Plan for Organizing Genealogy Materials

After assessing your genealogy materials, the next step is to create a plan for organizing them. A well-thought-out plan will make the process smoother and more efficient, enabling you to easily access and understand your family’s history. In this article, we’ll guide you through the essential elements of crafting an effective plan for organizing your genealogy materials, ensuring a successful and enjoyable project.

Establish your organizational goals:
Determine the primary focus of your organization efforts. You may choose to organize the materials by generation, family line, or geographic location, or you may combine these approaches. Consider the themes and patterns you identified during the assessment stage, as they can help inform your decision. Your organizational goals will serve as the foundation for your entire plan.

Identify categories and subcategories:
Based on your organizational goals, identify the main categories and subcategories that you will use to sort the materials. For example, if you are organizing by generation, your main categories could be the generations themselves, while subcategories might include different types of records, such as birth certificates, marriage records, and photographs.

Develop a labeling system:
Create a consistent and intuitive labeling system for your folders, binders, and documents. Use clear and concise labels that indicate the category, subcategory, and any other relevant information, such as names or dates. Consider using color-coded labels or tabs to make it easier to visually identify different categories or family lines.

Plan for future additions:
Ensure that your organizational plan is scalable and adaptable, allowing for the incorporation of new materials as your research progresses. Design your system to accommodate updates or additions without disrupting the overall organization.

Create a reference guide:
Document your organizational plan in a reference guide, outlining your goals, categories, subcategories, and labeling system. This guide will serve as a valuable resource as you work through the organization process, ensuring consistency and clarity.

Consider digitization and software tools:
As part of your plan, explore options for digitizing your materials and using genealogy software to manage your family tree. Digital archives can help preserve your materials and make it easier to share information with family members. Many software applications, such as Family Tree Guide, Roots Magic and Gramps, offer tools to help you create and maintain digital family trees.

Set a timeline and milestones:
Establish a realistic timeline for your organization project, including milestones for completing specific tasks or categories. Break the process down into manageable steps and set deadlines to help you stay on track and maintain momentum.

Creating a comprehensive plan for organizing your genealogy materials is a crucial step in building a well-structured family history project. By establishing clear organizational goals, categories, and a labeling system, you’ll set the stage for a successful and rewarding genealogy journey. Remember to be flexible and adaptable, as your research and discoveries may necessitate adjustments to your plan along the way.

From Chaos to Clarity: Taking Stock of Your Family Treasure

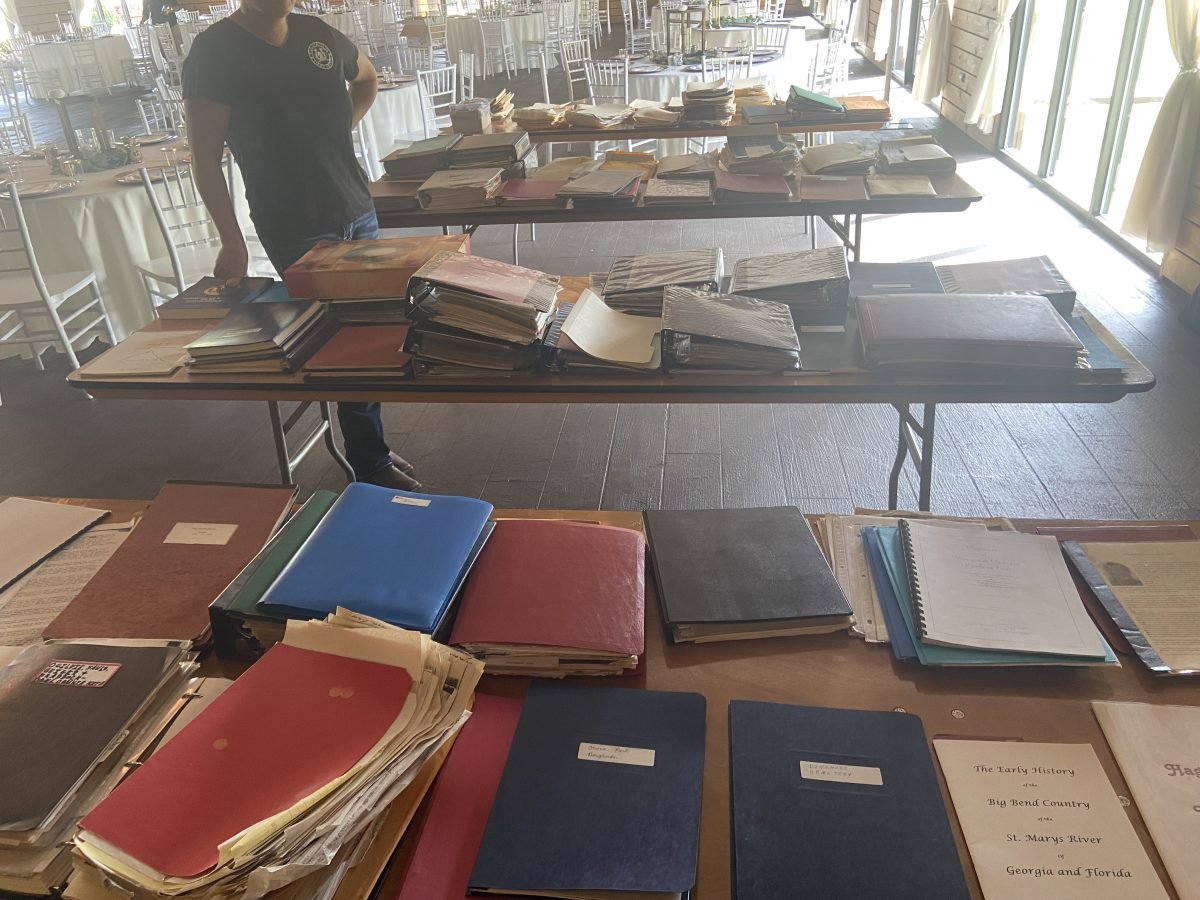
Discovering a trove of genealogy materials can be both exciting and overwhelming. Before diving into the organizational process, it’s essential to assess and understand the contents of these folders and binders. In this article, we will guide you through the crucial first step of assessing your genealogy materials, helping you establish a solid foundation for a well-organized family history project.

Assessing and Understanding Genealogy Materials

Discovering a trove of genealogy materials can be both exciting and overwhelming. Before diving into the organizational process, it’s essential to assess and understand the contents of these folders and binders. In this article, we will guide you through the crucial first step of assessing your genealogy materials, helping you establish a solid foundation for a well-organized family history project.

Prepare your workspace:
Set up a clean, clutter-free workspace with ample room to spread out the materials. Ensure that the area is well-lit, comfortable, and free from potential hazards that could damage the documents, such as direct sunlight or humidity. Gather necessary supplies, like pencils, notepads, sticky notes, and gloves to handle delicate materials.

Take an initial inventory:
Begin by opening each folder and binder and taking a high-level inventory of the materials. List the types of documents, records, and media you encounter, such as photographs, birth certificates, marriage records, census records, newspaper clippings, or letters. Note any folders or binders that contain a mix of different types of documents or records.

Identify recurring themes and patterns:
As you review the materials, look for recurring names, dates, locations, or other key pieces of information. Note any patterns or themes that emerge, such as certain surnames appearing repeatedly or a focus on a specific geographic area. These observations will help you determine the most effective organizational approach later on.

Check for existing organization:
Examine the current organization of the materials to see if there is a discernible structure or logic. Look for labels, notes, or tabs that may indicate previous attempts to categorize the information. Keep in mind that even if the existing organization seems inadequate, it may still provide valuable insights into the collection’s contents.

Create a preliminary timeline:
Using the information you’ve gathered so far, start creating a preliminary timeline or family tree. Jot down any significant dates, events, or relationships that you can glean from the materials. This will help you visualize the family’s history and identify gaps or areas that may require further research.

Note areas of interest or concern:
Flag any items that are particularly intriguing, fragile, or in need of repair. These materials may require special attention or additional research, so it’s essential to make a note of them during the assessment phase.

Document your findings:
Keep a record of your observations, either on paper or digitally, to serve as a reference throughout the organization process. Include a summary of the material’s types, recurring themes, existing organization, and any areas of interest or concern. This documentation will be invaluable as you move forward in your genealogy project.

Free Genealogy Assessment Forms

I have created two free forms for conducting an assessment on any folder, binder, or box of documents, whether donated or originally created by you.

The process of assessing your genealogy materials is a critical first step in organizing and understanding your family’s history. By taking the time to thoroughly review and document the contents of your folders and binders, you’ll establish a solid foundation for a successful and enjoyable genealogy journey.

From Chaos to Clarity

Organizing a large collection of family genealogy materials can be a rewarding task, as you’ll learn more about your family history in the process. Here are some steps to help you sort and organize the manila folders and loose papers effectively.

Unraveling Your Family’s Past with Organized Genealogy

Organizing a large collection of family genealogy materials can be a rewarding task, as you’ll learn more about your family history in the process. Here are some steps to help you sort and organize the binders, manila folders and loose papers effectively:

Assess the materials:
Start by reviewing the contents of each folder to get an overview of what you have. Look for patterns, recurring names, or other key pieces of information that can help guide your organization process.

Create a plan:
Determine your organizational goals, whether it be by generation, family line, or geographic location. You can also use a combination of these approaches. Decide on a color-coding or labeling system that will help you easily identify each category.

Sort and categorize:
Begin sorting the loose papers and records based on your chosen organization method. You may want to create subfolders within each surname folder to separate the materials into distinct categories, such as birth records, marriage records, death records, photos, letters, or other documents.

Label and date:
Label each document or record with the relevant names, dates, and relationships, if not already provided. This will make it easier to find and understand the information in the future. Use archival-safe pens or pencils for labeling to avoid damaging the documents.

Digitize:
Consider scanning or photographing important records and documents to create a digital archive. This will help preserve the information and make it easier to share with family members. Be sure to store digital files in multiple locations, such as on your computer, an external hard drive, and a cloud-based storage service.

Create a family tree:
Use the information you’ve gathered to create a visual family tree. Many online resources and software applications are available to help you design and maintain a digital family tree, such as Family Tree Maker, Roots Magic, or Gramps.

Store materials properly:
Ensure that your physical records are stored in a safe and secure location. Use acid-free, archival-quality materials to protect your documents from damage. Store your folders in a cool, dry, and dark place to prevent deterioration.

Update and maintain:
As you continue to research your family history, keep your folders and digital archives up to date with new information. Encourage family members to contribute and share their own records or stories.

Remember, organizing a family genealogy collection takes time and effort. Be patient and enjoy the journey of discovering your family’s history.